Hi, crochet lover!
A new season of Crochet Lovers Tutorials begins, with new step-by-step tutorials every Thursday on YouTube and mini tutorials every week on Instagram and Facebook :)
This season starts on the right foot, of course. We're going to learn a crochet technique that blew my mind the moment it came into my life... it's the BROOMSTICK LACE.
It's quite the versatile stitch with which we can weave scarves, hats, gloves, blouses, blankets, curtains ... On this occasion I will teach you how to crochet a scarf or neck warmer on a broomstick lace (you decide on the final dimensions and therefore the amount of material).
RECOMMENDED DIMENSIONS:
Children neck warmer: 4.5 x 18 inch / 11 x 45 cm
Adult neck warmer: 6 x 28 inch / 15 x 55 cm
Children scarf: 4.5 x 51 inch / 11 x 130 cm
Adult scarf: 5.5 x 70 inch / 14 x 180 cm
APPROXIMATED CROCHET TIME: one afternoon, ideal for crocheting while watching a movie or having a cup of coffee with friends!
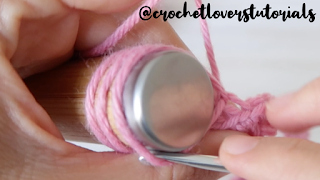
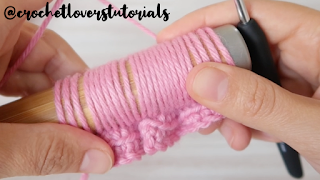
As you will see in the video tutorial at the end of this post, you will need an external element for this crochet technique that will help you to create the characteristic holes. A thick knitting needle (type 15 mm) is usually used, but we can use any tubular element that we have at home. I've used the stick where I hang the paper towel roll. If you can't find anything like this at home, the good news is that the BROOMSTICK LACE can be done with the help of a ruler; yes, a classic ruler, like the ones we used in school.
So write down the list of materials because we're going to start:
We'll then go back by making a row of single crochets in order to start our long-awaited broomstick lace. The broomstick lace consists of 2 phases: the "yarn over phase" and the "single crochets phase".
This season starts on the right foot, of course. We're going to learn a crochet technique that blew my mind the moment it came into my life... it's the BROOMSTICK LACE.
 |
| Broomstick Lace crochet tutorial | Crochet Lovers Tutorials |
It's quite the versatile stitch with which we can weave scarves, hats, gloves, blouses, blankets, curtains ... On this occasion I will teach you how to crochet a scarf or neck warmer on a broomstick lace (you decide on the final dimensions and therefore the amount of material).
RECOMMENDED DIMENSIONS:
Children neck warmer: 4.5 x 18 inch / 11 x 45 cm
Adult neck warmer: 6 x 28 inch / 15 x 55 cm
Children scarf: 4.5 x 51 inch / 11 x 130 cm
Adult scarf: 5.5 x 70 inch / 14 x 180 cm
APPROXIMATED CROCHET TIME: one afternoon, ideal for crocheting while watching a movie or having a cup of coffee with friends!
As you will see in the video tutorial at the end of this post, you will need an external element for this crochet technique that will help you to create the characteristic holes. A thick knitting needle (type 15 mm) is usually used, but we can use any tubular element that we have at home. I've used the stick where I hang the paper towel roll. If you can't find anything like this at home, the good news is that the BROOMSTICK LACE can be done with the help of a ruler; yes, a classic ruler, like the ones we used in school.
So write down the list of materials because we're going to start:
- Thread or wool for a medium crochet hook (between 3 and 6 mm). You will need approximately 20 grams for a collar or 50 grams for a scarf
- Crochet hook to match your wool (I'll use a 4 mm one)
- Your external element: a thick knitting needle, stick or ruler. Keep in mind that its diameter will determine the size of the holes in your broomstick lace
- Wool scissors and needle
- Buttons (if you are going to crochet the collar)
We'll then go back by making a row of single crochets in order to start our long-awaited broomstick lace. The broomstick lace consists of 2 phases: the "yarn over phase" and the "single crochets phase".
As you will see in the step-by-step video tutorial at the end of this post, the "YARN OVER PHASE" consists of doing a single crochet on every stitch available on our needle/stick/ruler...
Then we'll go back creating 5 single crochets for every 5 yarn overs available in what I call the "SINGLE CROCHETS PHASE".
At the end of these two phases, you'll have your COMPLETE ROW OF BROMSTICK LACE!
And now we just keep repeating this process. You'll be able to crochet and crochet all the rows you need to finish your project. If it's a collar, we'll crochet to a length of 45 cm for children and 55 cm for adults. If we're weaving a scarf, we'll crochet up to 130 cm for children and 180 cm for adults.
The broomstick lace has a beautiful finish, so by just cutting the thread and hiding it with the wool needle, our project will be done. For the neck warmer, you can add a pair of buttons, using the "eyes" of the lace to close it.
That's all for now, crocheters. Here's the step-by-step video tutorial. Do you dare to crochet it? Let's get to work!


